
Configure The Try It Capability
The “Try It” functionality in our API documentation allows users to interact with endpoints in real time, directly from the browser. Instead of just reviewing static examples, developers can input parameters, execute requests, and instantly see live responses, making it easier to understand how the API behaves. This hands-on approach accelerates learning, simplifies testing, and helps users validate integrations quickly without needing to leave the documentation or set up external tools.
Ensure Your System Is Accessible
To use the “Try It” functionality, your target API server must be accessible from your environment. If it is not already configured, you may need to work with your system administrator to ensure that your installation allows requests from the documentation interface. Specifically, developer.logisense.com should be added to your CORS policy so that requests initiated from the documentation interface can be successfully executed against your API.
Setup Yor Servers
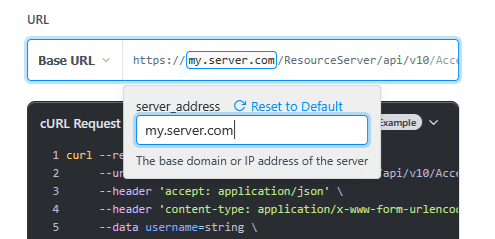
To begin you will want to setup your server URLs. They are located in the Base URL dropdown
- The first is the path to the Authorization Server which is what you will use to authenticate and get your API token
- The second is the path to the Resource Server where you will interact with system data
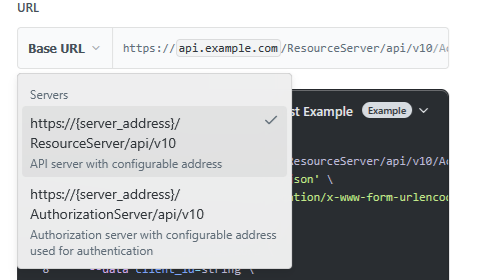
Select your desired URL to override the {server_address} variable. Do this for both the Resource and the Authorization Server.
Getting Your API Bearer Token
Go to the /Access/Login POST path and follow the Tokens & Authentication instructions. Be sure to select the Authorization Server URL for your API request. Fill in your authorization parameters and press the "Try It!" button.
If successful, it should return with a result that looks like the following:

Calling Resource Server APIs
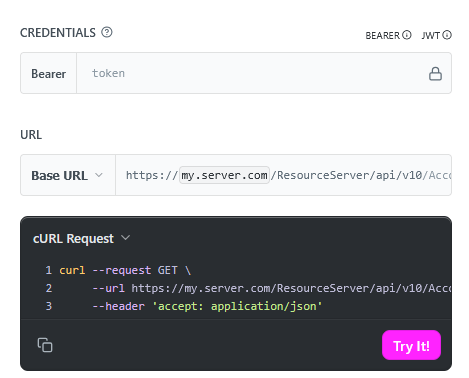
Now go to any of the other API paths that you want to try. Select the Base URL to be the Resource Server. On the API pages that require the token authentication you will find the CREDENTIALS area above the Base URL. Paste in the access_token that you received from the Login request. You are now good to go for calling any of the APIs in the documentation.
Updated 4 months ago