Setup Postman Environment
NOTE: You need to use Postman desktop to properly access your instance of LogiSense Billing.
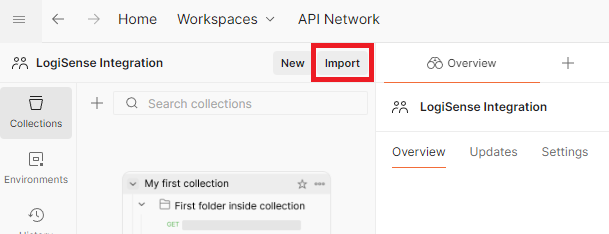
Importing the Collection
Open up your instance of Postman and go to the collections area of the desired workspace. From there select the Import button to import your downloaded OpenAPI specification file.
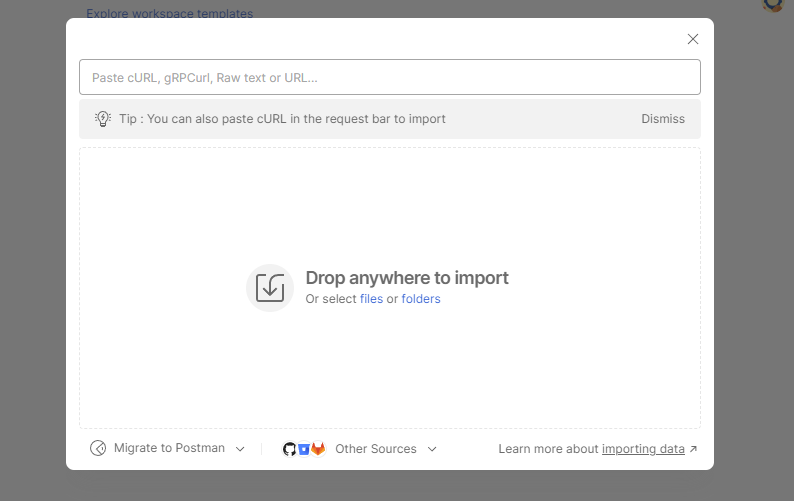
You will then be prompted to select the file to import into the environment. Simply drag-and-drop the desired API specification file into this dialog.
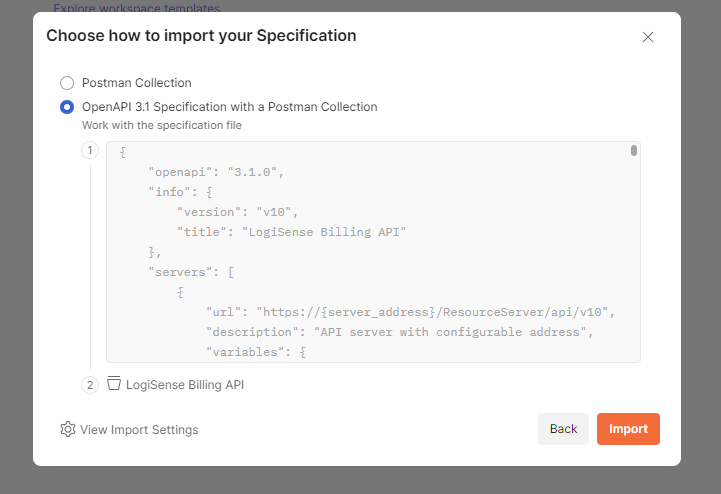
It will briefly process the file and then ask you how you would like to import your specification. Please select the OpenAPI 3.1 Specification with a Postman Collection option and then press Import.
This will then create a small area at the bottom of Postman showing the importing process.
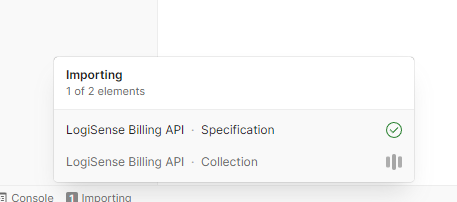
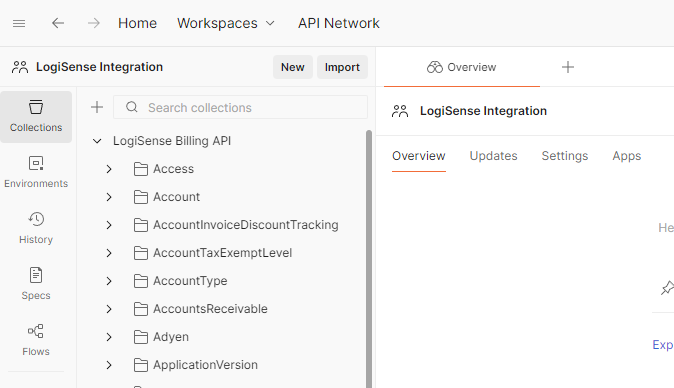
Once importing is complete you will see the collection available to use.
Setting up your Environment Variables
To initially configure your environment you can setup some different variables that will make calling APIs nice and simple. Select the LogiSense Billing API top level node and then select the Variables tab.
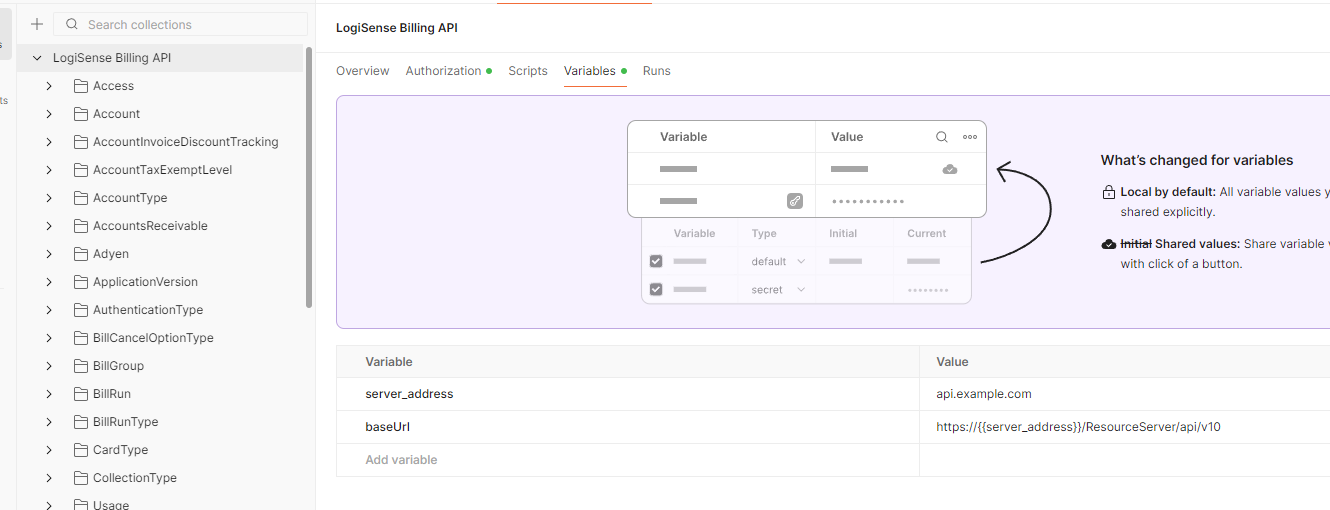
In this section you will want to specify the URL path of your instance of LogiSense Billing in the server_address variable. As you can see this variable is also used with the baseUrl variable.
You can now use these variables as part of your workflows in Postman.
Getting Your Token
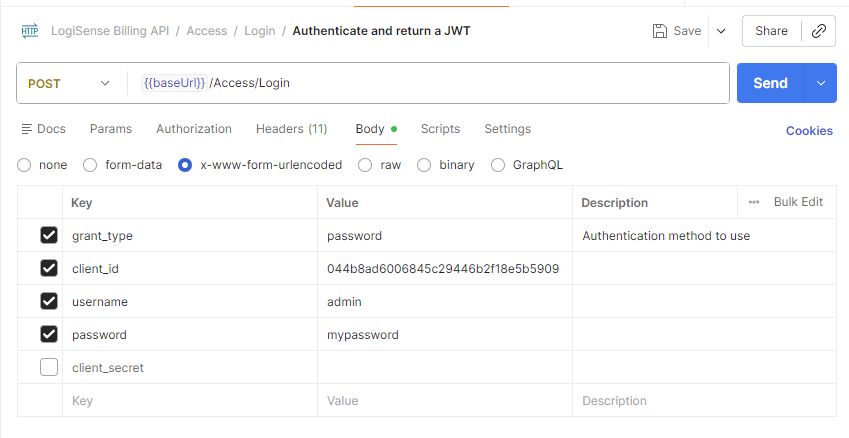
1) Fill in your authorization details
To retrieve your token open the Access/Login POST operation and navigate to the body tab. This is where you will fill in all the information for authorizing with the system. For details on which fields to fill in based on your authorization type please see our Tokens & Authorization information.
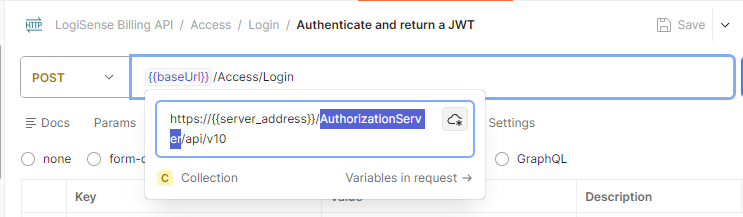
2) Set your authorization path
Your authorization path is different than standard API requests so you will need to change your baseUrl for the request. Hover your mouse over the {baseUrl} in the action bar to reveal the edit capabilities. In here you will want to replace the ResourceServer with AuthorizationServer in the path.
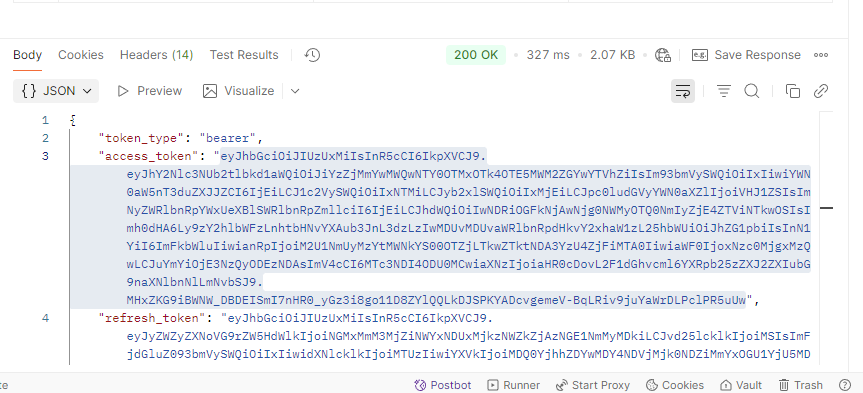
Now go ahead and execute the POST action by pressing the Send button. This will give the JSON result which includes your token in the access_token property.
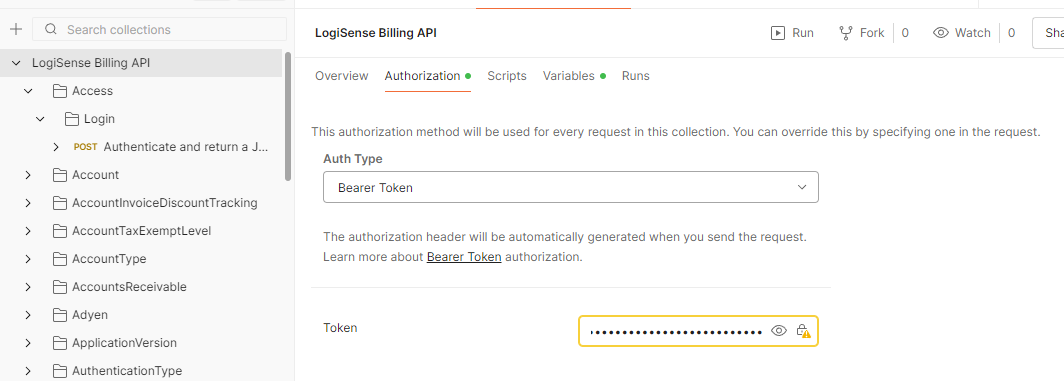
Saving Your Token
To save your token in Postman so that it can be used throughout your session, select the contents of the access_token property and copy it to your clipboard.
Now you will navigate back to the main LogiSense Billing API top node and select the Authorization tab. In the authorization tab you will find a field called Token. Delete any existing value in this field and paste in your copied token content.